Fix it: Roto-Hoe Shredder, 5hp
It started as a simple idea, then it snowballed. You know what we need? No, what? A chipper. A what? A chipper.
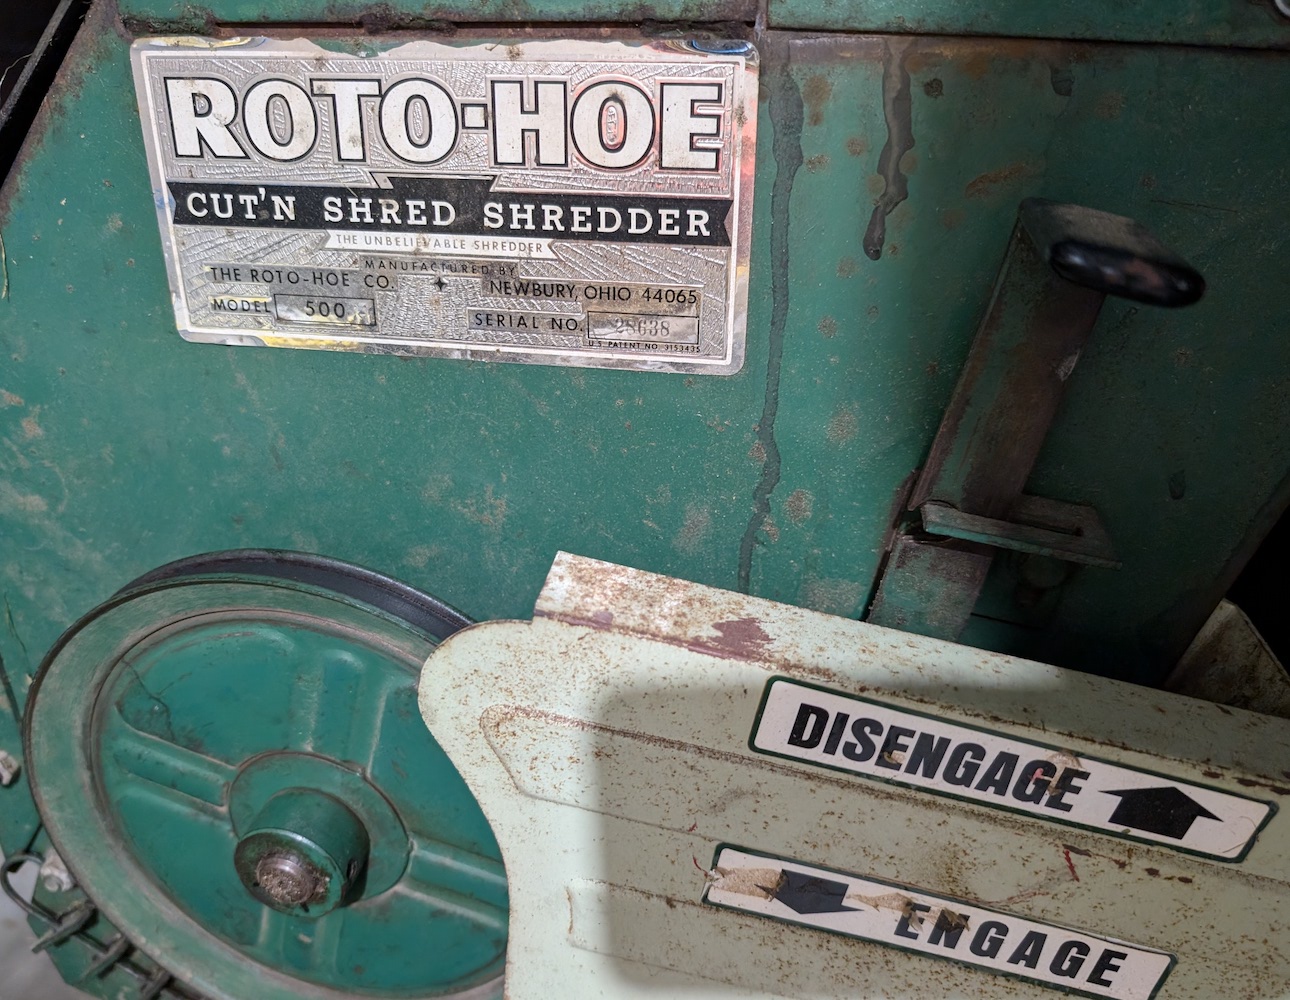
Figure 1: Roto-Hoe 500, manufactured in Newbury, Ohio.
We have a small house that sits on 1/2 acre of mother nature–grasses, weeds, bushes, and large mature trees. It’s a never-ending task of cleanup and yard maintenance: picking up sticks, sawing branches, raking leaves, removing shrubs, on and on. Fortunately, we have a ravine along one side of the property that for many years has seemed like a good place to dump stuff. You know, to let it decompose. But that’s a slow process. What we mostly have is a ravine full of debris, a 4 foot deep tangle of branches, leaves, logs, and stuff. It’s not very pretty, and it’s not an easy walking surface. It resembles a badly-built beaver dam more than anything else.
You know what we need? A chipper.

Figure 2: BEFORE: Ravine before the chipper arrived.
If we had a chipper, maybe we could turn a negative into a positive. Maybe we could have a hillside full of wood chips and organic matter rather than a tangled, unwalkable beaver dam. There’s a walking path at the bottom of the ravine. People look up the hill and see this mess. It would feel good to turn this into something natural and maybe even beautiful. And if we got really ambitious, we could use some of this carbon in a Johnson Su Bioreactor to make great compost for gardening. So, we set out to buy a chipper.
We don’t need an expensive chipper. An old, reliable machine would work. A good brand, with a common engine that has readily available parts, would be perfect. We looked at a few old machines and settled on a Roto-Hoe 500 with a 5hp Tecumseh engine. These engines are everywhere, from lawn mowers to snowblowers to chippers. Parts are cheap and readily available. The chipper itself was made in Ohio, probably in the early 1980s, so more than 40 years ago. We gave the owner $50 for the chipper. He said it leaked fuel the last time he used it years ago. Now the fun begins. Will it run?
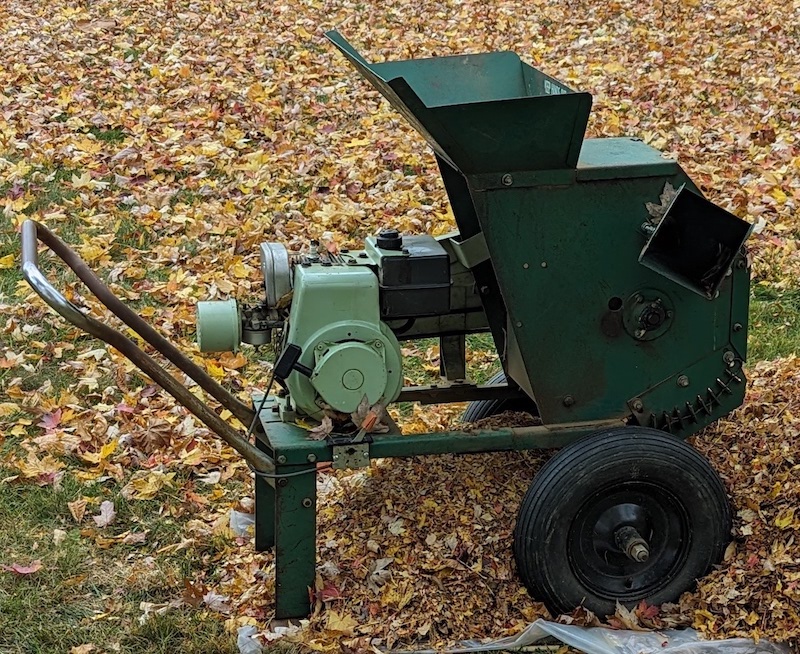
Figure 3: 40 year old Roto-Hoe 500.
Our strategy was simple: Let’s do the minimum necessary to get it running, then push some branches through it. If it works, we can progressively invest more time and money, as long as it continues to run. We started with the basics: change the oil, grease the bearings, and fix the fuel leak. The fuel leak is probably related to the carburetor, so we ordered a carburetor rebuild kit, removed the carburetor, and rebuilt it. When we filled the tank with gas, the gas still leaked everywhere.
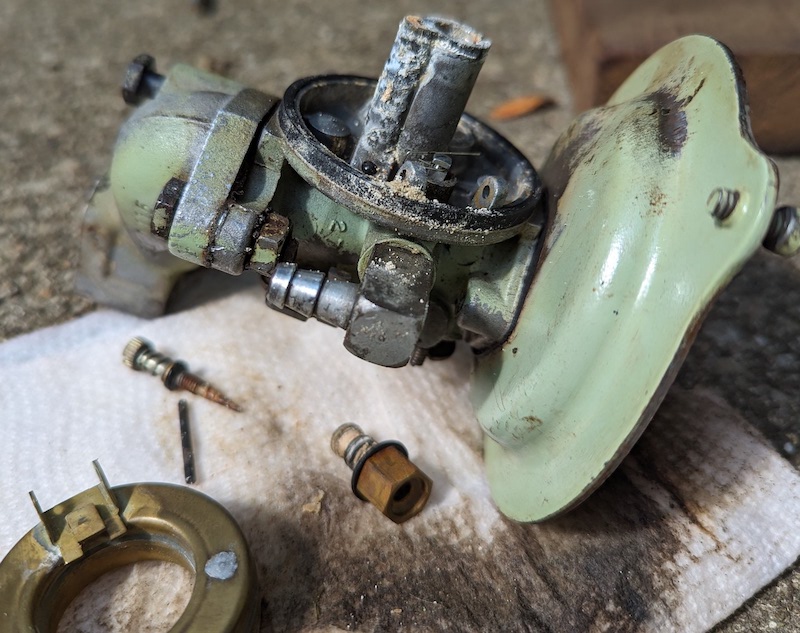
Figure 4: Clean and rebuild dirty carburetor.
A quick inspection revealed that the gas tank outlet was mostly cracked off the tank. To avoid waiting for the delivery of a $35 tank, we did a quick patch by melting the plastic tank outlet back together to stop the leak and reinforcing the fix with a copper washer and 5-minute epoxy. It’s not a great fix, but we’re on to the next problem.
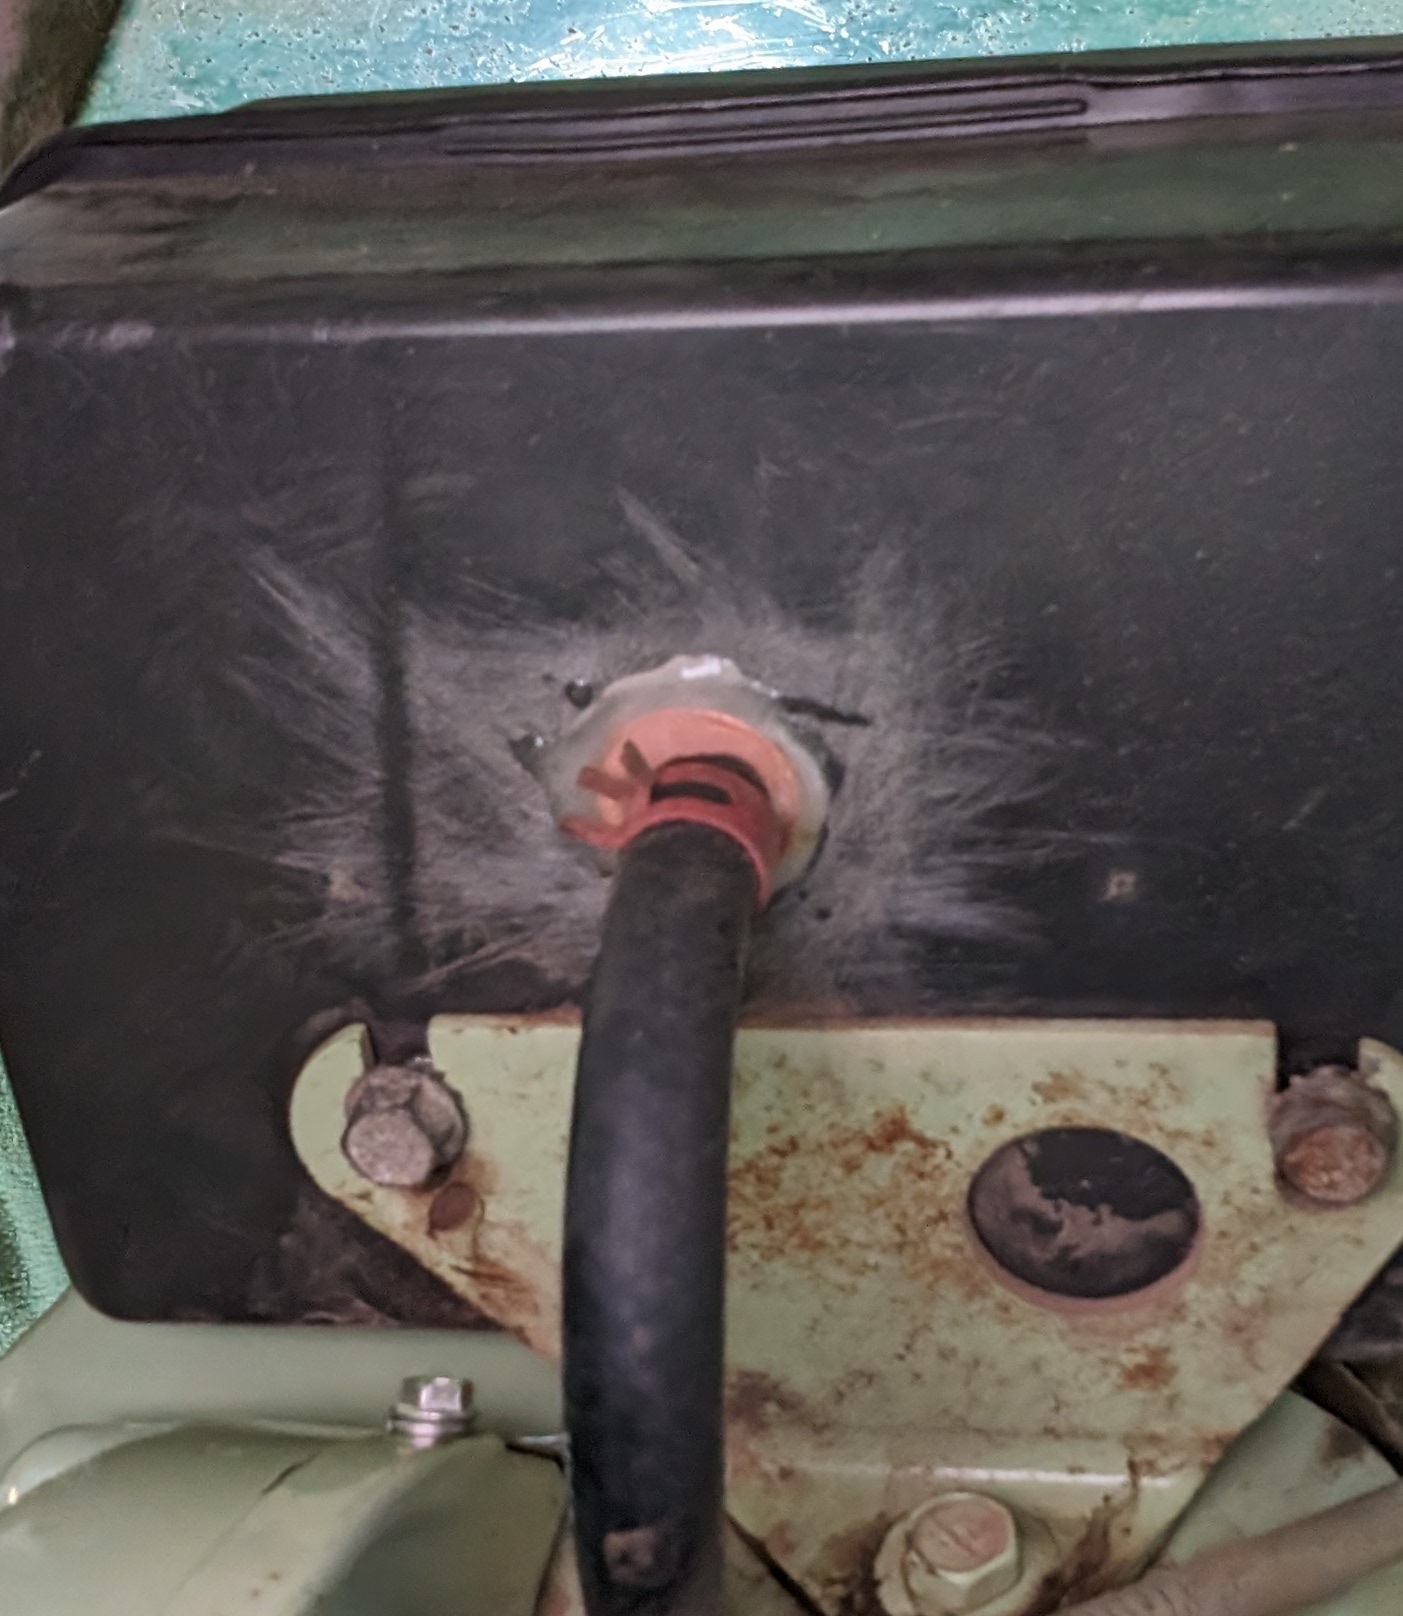
Figure 5: Fuel tank outlet patched with copper washer and 5-minute epoxy.
We again put some gas in the tank, and it again leaked, but in a different place. That’s progress. Surprisingly, the metal carburetor bowl had a hole in the bottom. Fortunately, our rebuild kit came with a new bowl; we just didn’t use it. We thought the original bowl was fine. Obviously not, so we installed the new bowl. While we were at it, we also replaced the rubber fuel line from the fuel tank to the carburetor. Problem solved. No more leaks.
Before starting the engine, we checked the drive mechanism, which is a V-belt and two pulleys between the engine and the hammer wheel. V-belts are tough, and this one is fine. The set screws fastening the pulleys to the shafts are also tight, so let’s go.
The engine doesn’t start on the first pull, but it doesn’t take many. Once it’s running, we adjust the carburetor because we just rebuilt it. The engine is now running well. Not bad for a 40 year old motor. Let’s try the cutter and see what it can do. But first, THIS THING IS DANGEROUS! Both the hopper on the top and the chute on the side are wide open. Lots of body parts would fit in those openings. And lots of wood chips and chunks can fly out. Personal protective equipment (PPE) is required. We geared-up with glasses, ear plugs, and gloves. We’re careful not to wear anything that can get caught on a branch and pull us into the cutters.
The Roto-Hoe makes a lot of noise and vibration, but it definitely chips and chops. The top hopper is a good place for smaller branches and leaves. The side chute has 3 heavy, rotating, cutting blades, meant for branches up to about 1 inch in diameter. (We used a chainsaw for larger branches.) We didn’t sharpen the side cutters, but they cut anyway. The machine was a very good purchase. It runs and reduces branches into chips, just like we hoped. The ravine looks great! Mission accomplished.

Figure 6: AFTER: The ravine looks great after the chipper arrived!
The path forward is to put some hours on the chipper and learn how best to use it. We learn two main lessons: It’s best to fill the top hopper slowly rather than clogging it. Clearing a clog takes way longer than filling slowly. And don’t put stringy things into the side hopper. Green bark or stems, for example, are likely to wrap around the axle and slow the machine. Unwrapping the axle is tedious and annoying. Other than that, it’s very satisfying to turn piles and piles of debris into really pleasant chips. After processing stuff at the top of the ravine, we ventured down the hill and pulled piles and piles of stuff back up the hill so we could transform it into something closer to soil. Very cool. The results are so nice, we wondered how we lived without the chipper.
Chip a little, fix a little
During the months ahead, we chipped a little, fixed a little, chipped a little, fixed a little. Some of the fixes are highlighted below.
The chipper got harder to start. After troubleshooting, we realized that the spark plug wire was sitting on the hot engine head, causing the insulation to melt and short the spark plug. We added some insulation to the wire. Problem solved.
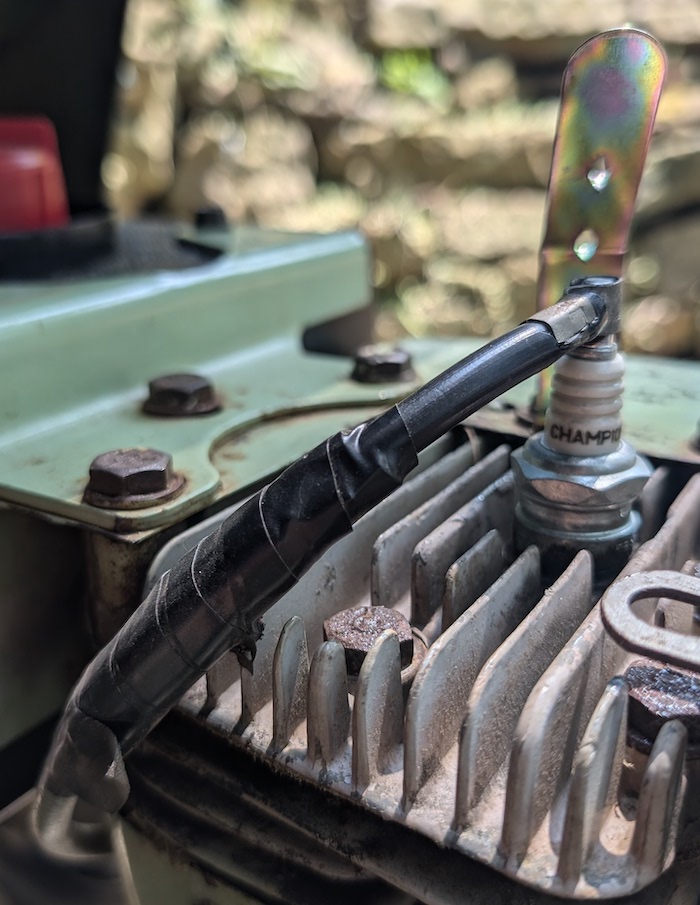
Figure 7: Quick fix to better insulate spark plug wire
The chipper started to run rough. We adjusted the needle value in the bottom of the carburetor bowl and the engine ran smooth and strong. The needle value vibrates loose, so this requires regular adjustment. Finding a permanent fix is on the to-do list.
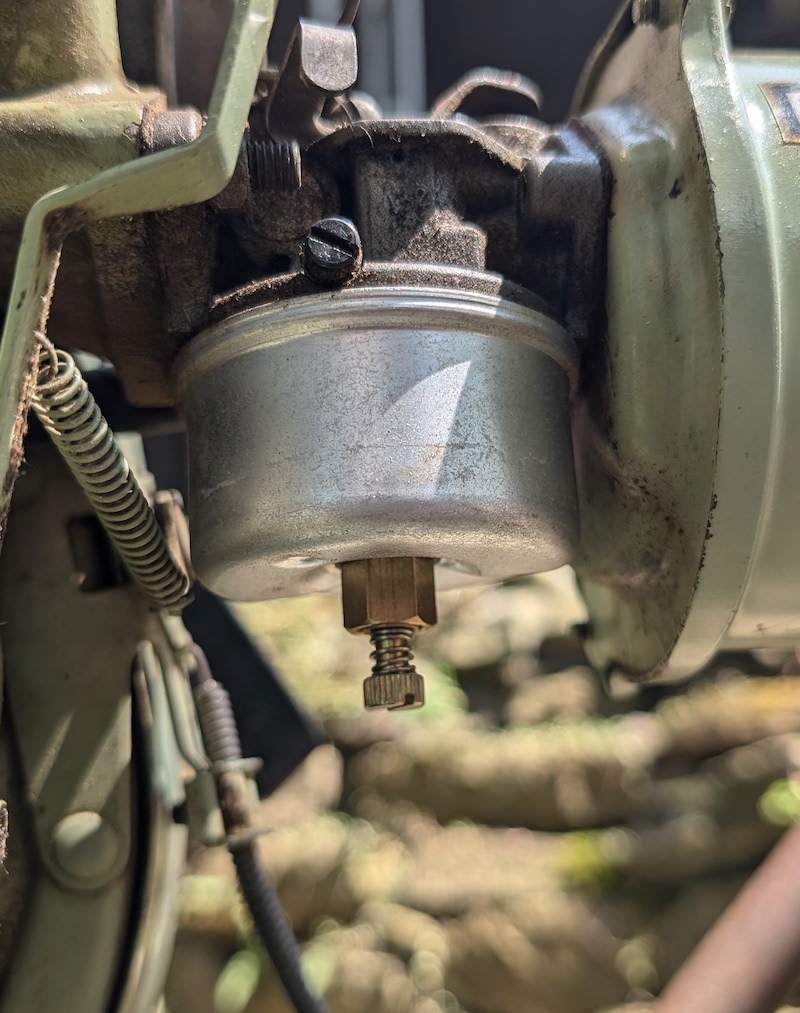
Figure 8: Carburetor needle value tends to vibrate loose
We sharpened the side cutters with a Felco 906 carbide sharpener. Sharpening is a balance between making the blades sharp and keeping the edge strong enough to handle larger branches. The newly sharpened blades cut way better.

Figure 9: Felco 906 Sharpener, Carbide Stone
The starter rope dangled loose rather than recoiling tightly, particularly in cold weather. We bought a replacement spring for the recoil, but we didn’t use it. A simple cleaning, lubricating, and adjusting of the recoil spring and housing made the starter work like new.
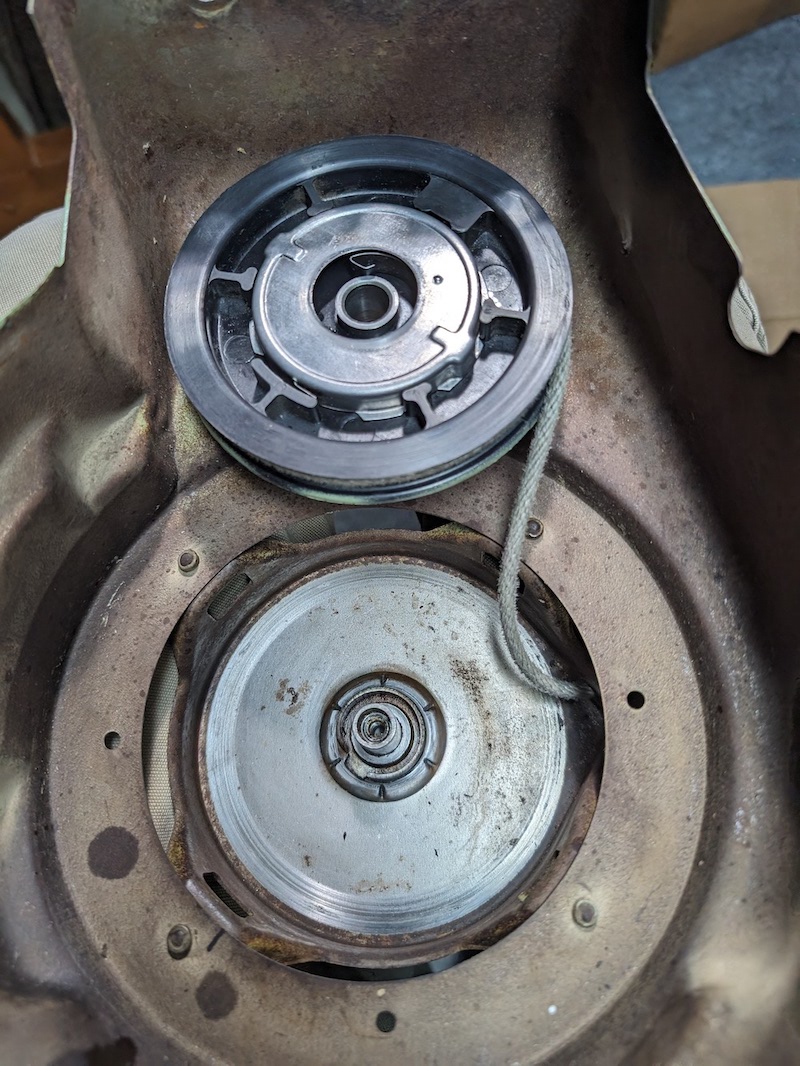
Figure 10: Clean, lubricate, and adjust the starter rope recoil spring.
Because the machine vibrates, the two muffler screws tend to vibrate loose. We lost one screw in the grass. The exhaust heat aggravates the problem because the screws get hot and stretch, making them loose. We drilled some small holes in the cap screw heads and wired the two screws together. No more loose screws. We also added a steel plate across the muffle to prevent the screws from crushing the muffler body.
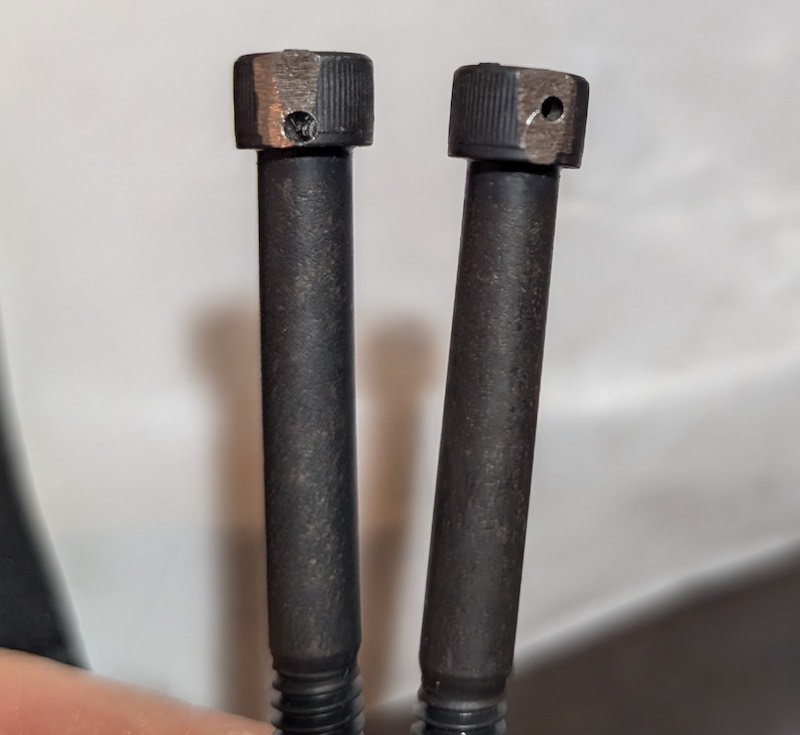
Figure 11: Drill holes in muffler cap screws to wire them together.
Related to the muffler, the muffler gasket was disintegrating, making the machine noisy and messy with black soot. It took time to get an OEM replacement gasket, so we tried a couple of temporary fixes. We made a gasket from paper gasket material, which nearly caught fire from the heat. Not a good idea. We also tried high-temperature RTV (gasket material in a tube), which was also quickly destroyed by the heat. Another bad idea. The new OEM gasket is built for the heat and has been working fine. Lesson learned.
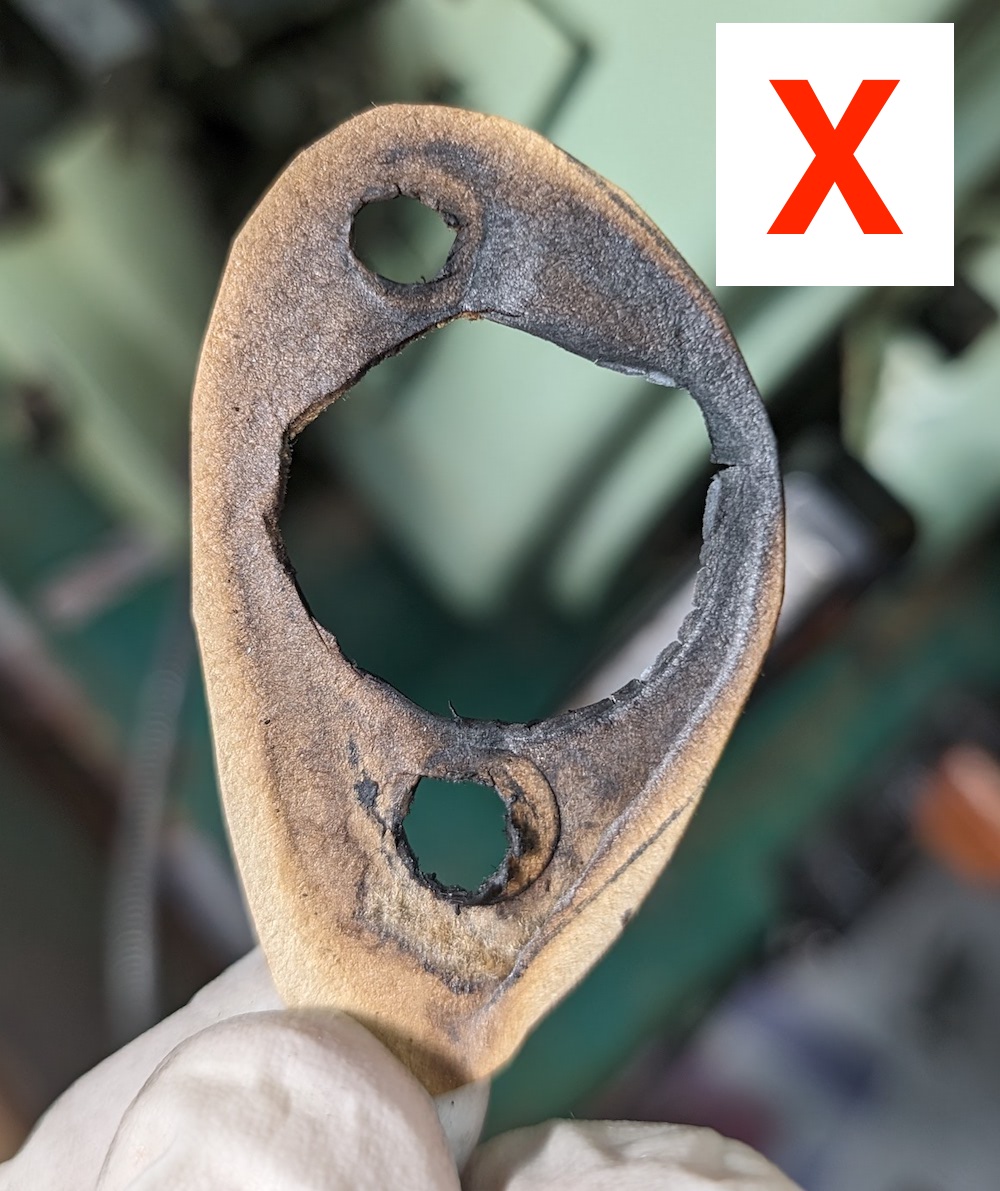
Figure 12: Handmade paper muffler gasket failed. Muffler is too hot.
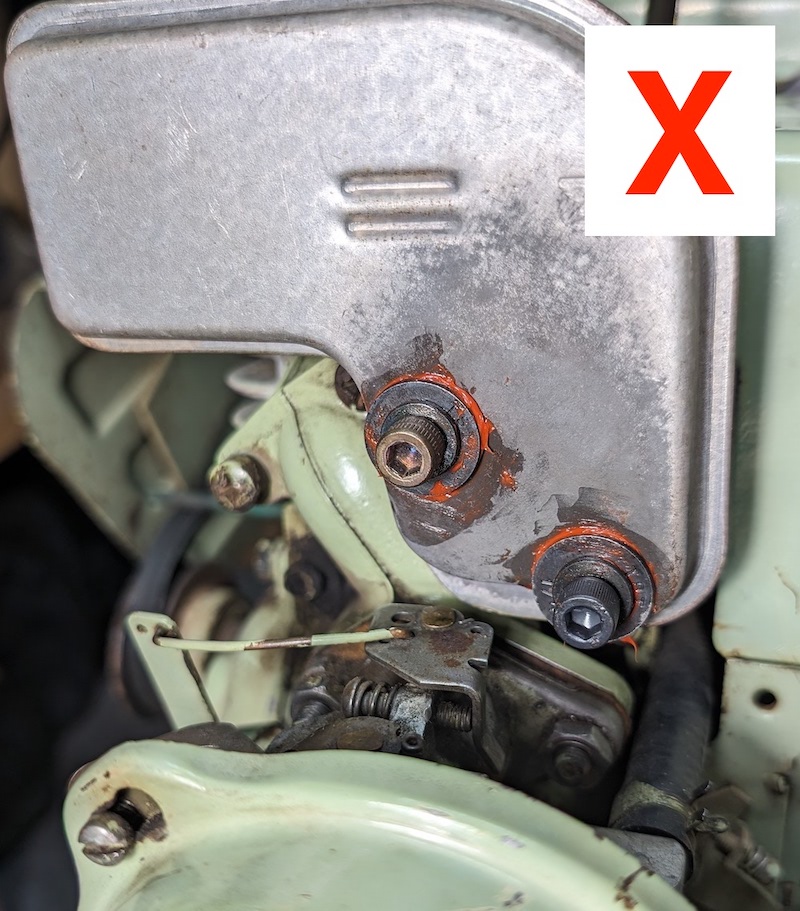
Figure 13: High-temperature RTV muffler gasket failed. Muffler is too hot.
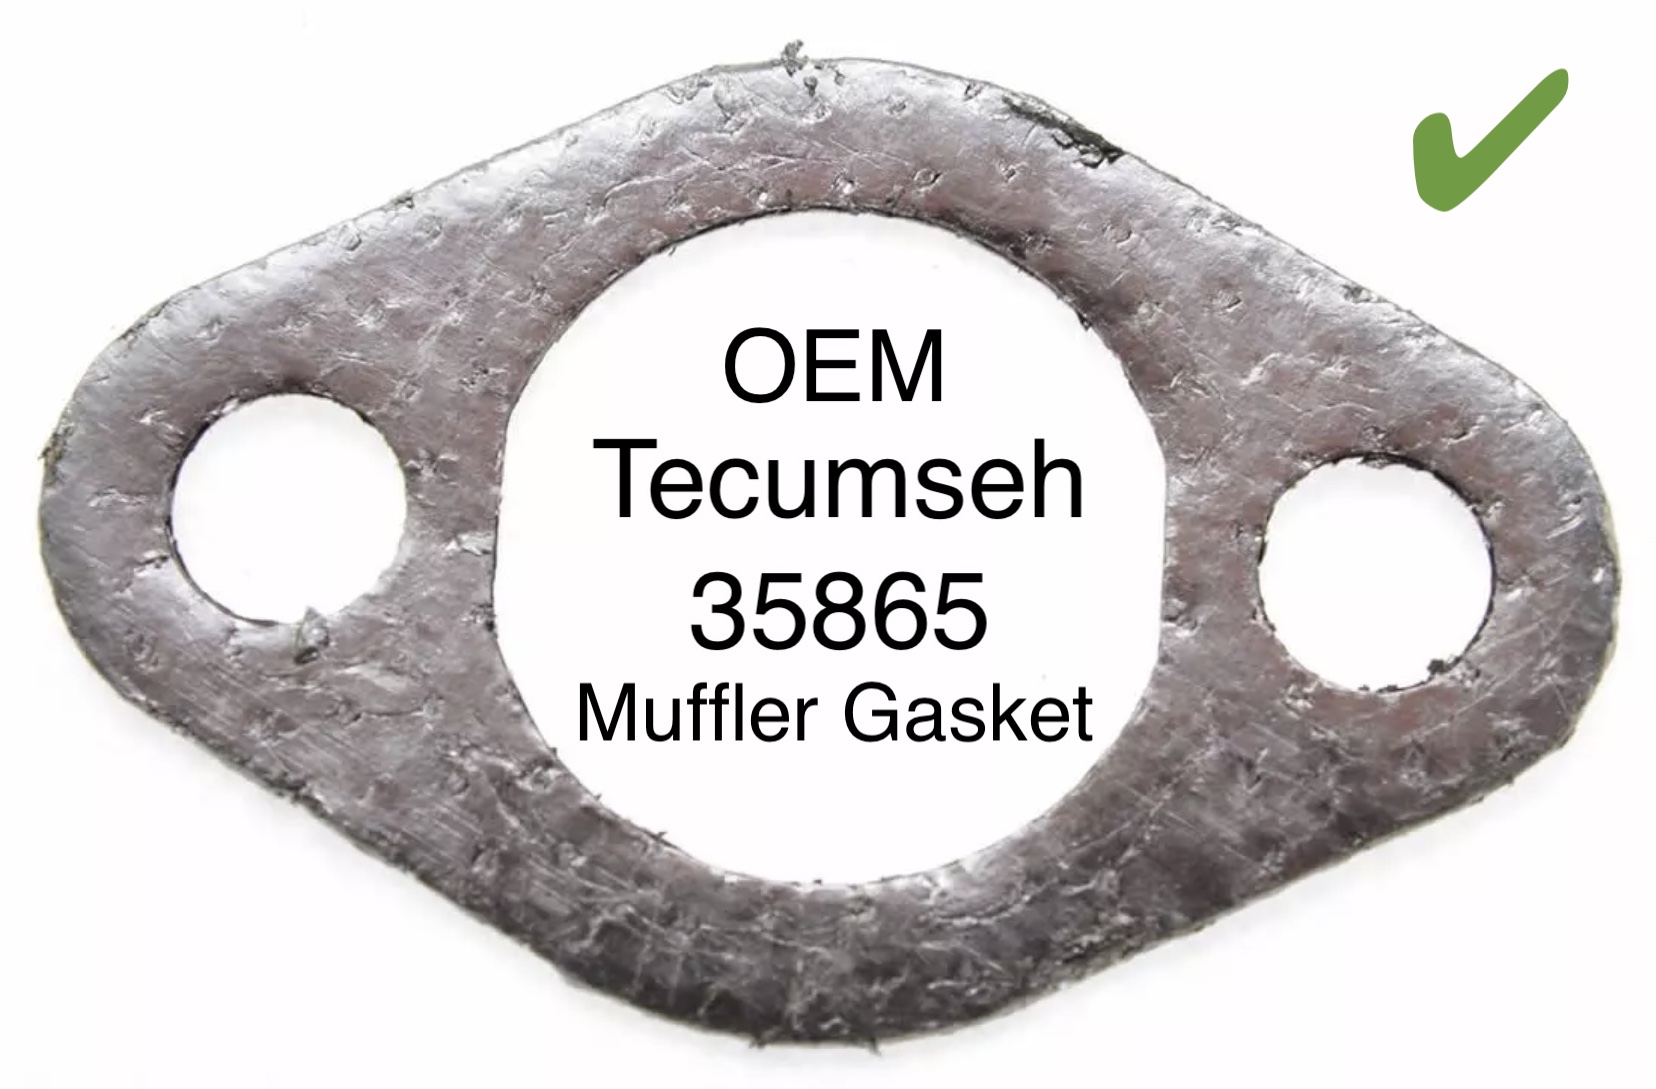
Figure 14: OEM Tecumseh muffler gasket. Metallic appearance. Works great.
After 8 months of occasional chipping, the patch on the fuel tank finally started leaking. We were surprised it lasted 8 months since our epoxy is not fuel resistant. We had already ordered the new tank, so that was an easy fix, and the fancy new red cap works much better than the old cap.
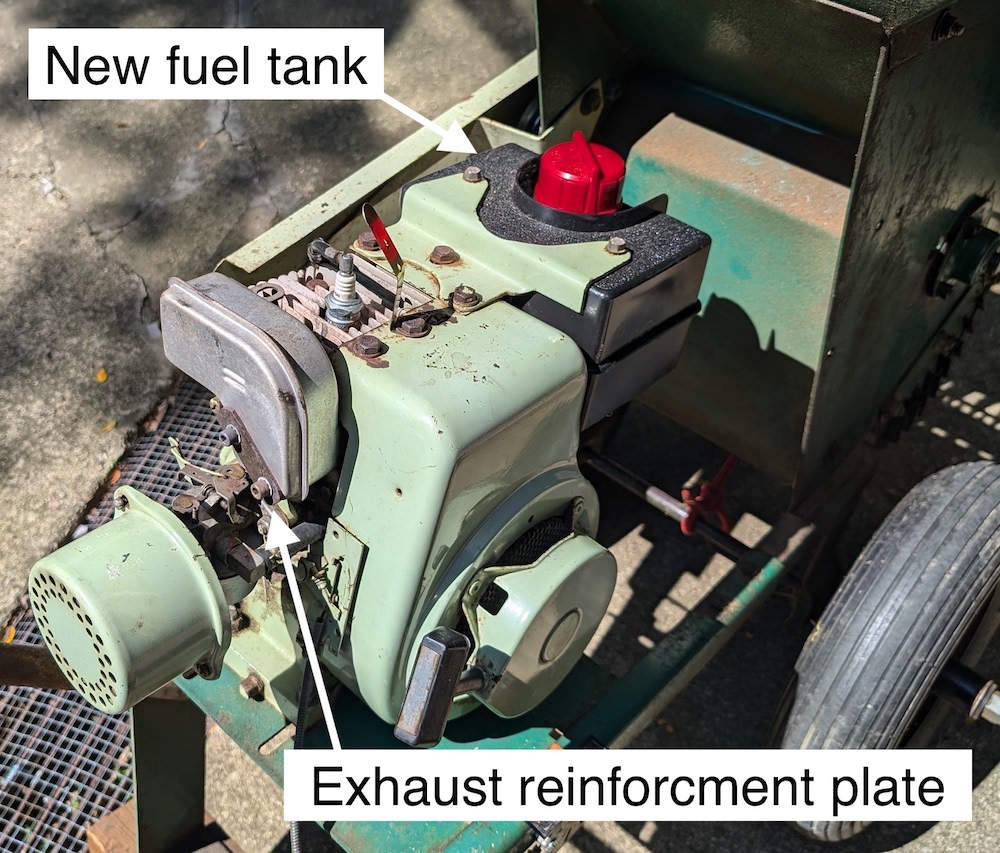
Figure 15: New fuel tank. Steel plate to avoid crushing muffler
Of course, none of the fixes were as straightforward as they sound. When something unexpectedly stops working, it’s annoying. My imaginations throw up explanations, one after another, trying to find one that fits. The lack of answers is unsettling. The unknown is uncomfortable. But with enough experience and some trial-and-error and some sporadically calm reasoning, the unpleasant process often ends in a workable fix. So I keep the faith. I keep trying. I rest if I need to. A solution usually emerge soon enough.
Now that we’ve fixed a bunch of smaller problems, it’s time to address the heart of the machine: the hammer wheel, bearings, shaft, and seals. These parts take the brunt of the forces and chop sticks.
Hammer wheel, bearings, shaft, and seals
The hammer wheel is a heavy metal cylinder that rotates on a one-piece shaft that spans the cutting box. The shaft is supported by a tapered roller bearing on each end. The grease in the bearing is loosely retained by a soft fibrous seal, which also prevents dirt from getting into the bearing.
The hammer wheel has two cutting actions. First, it has 3 cutters on the side that chop larger sticks pushed into the side chute. Second, it has 21 “hammers” that break smaller sticks by brute force, chopping them into smaller and smaller pieces until the chips are smaller enough to fall through the screen in the bottom.
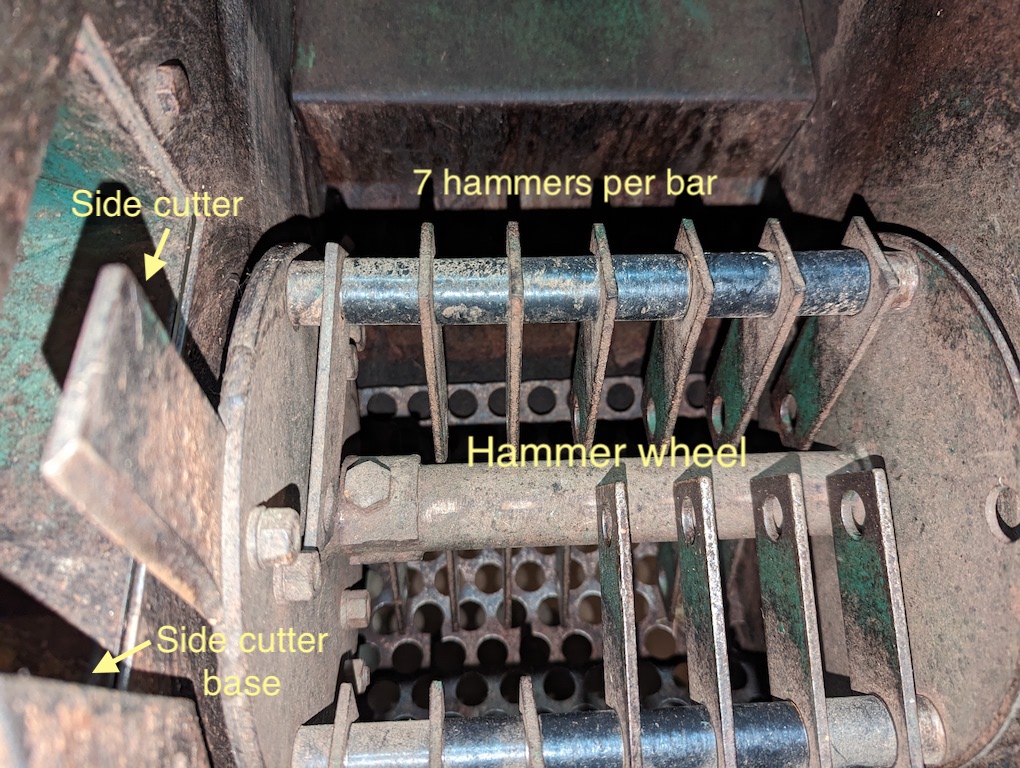
Figure 16: Hammer wheel before removal. 3 rows of 7 hammers.
As the size and volume of the sticks increases, so does the violence in the hammering box. There’s a lot of noise and vibration, so the cutters, hammers, shaft, and bearings take a pretty good beating. Let’s make sure everything is in good working condition.
For a 40 year old machine, the cutters and hammers show very little wear. That’s good. But the hammer wheel does have more side-to-side play than it should, which causes an oversized gap between the side cutters and the base, which reduces cutting performance. Looking at the hammer box, the sides are bulged out from years of use. That explains the side-to-side play. The play also causes the bearings to be loose in their races, which isn’t good. Rather than trying to fix the bulges in the sides, we’ll add a shim (a washer) on the shaft to effectively increase its length and remove the excess side-to-side play.
Everything disassembles easily. The shaft is held by one bearing housing on each side. And the hammer wheel attaches to the shaft with a single large bolt, visible on the hammer wheel above.
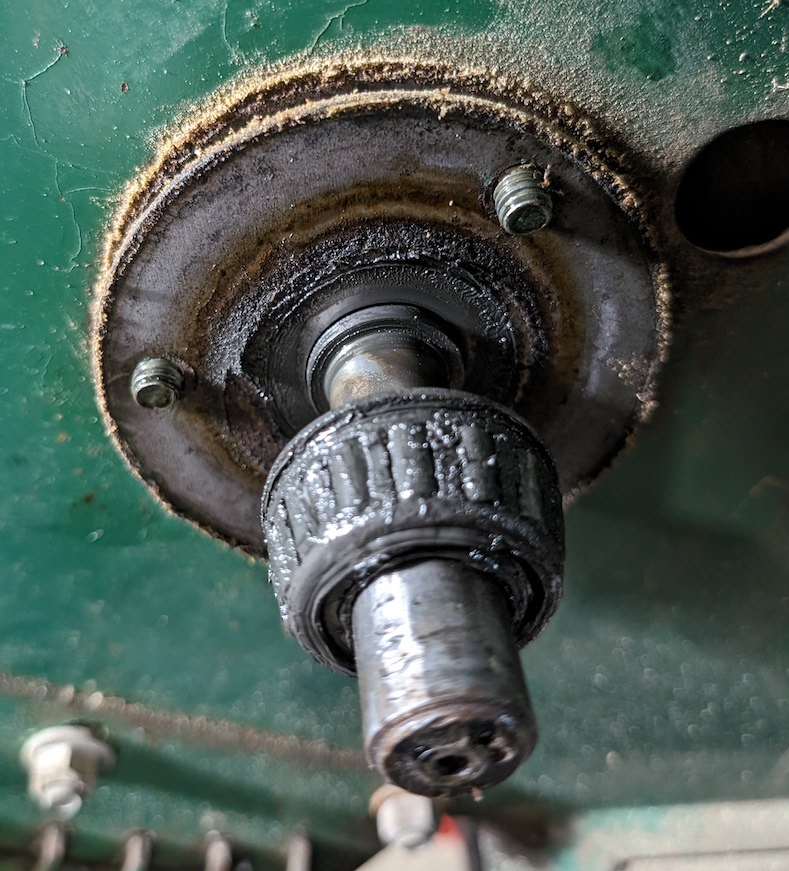
Figure 17: Tapered roller bearing during disassembly.
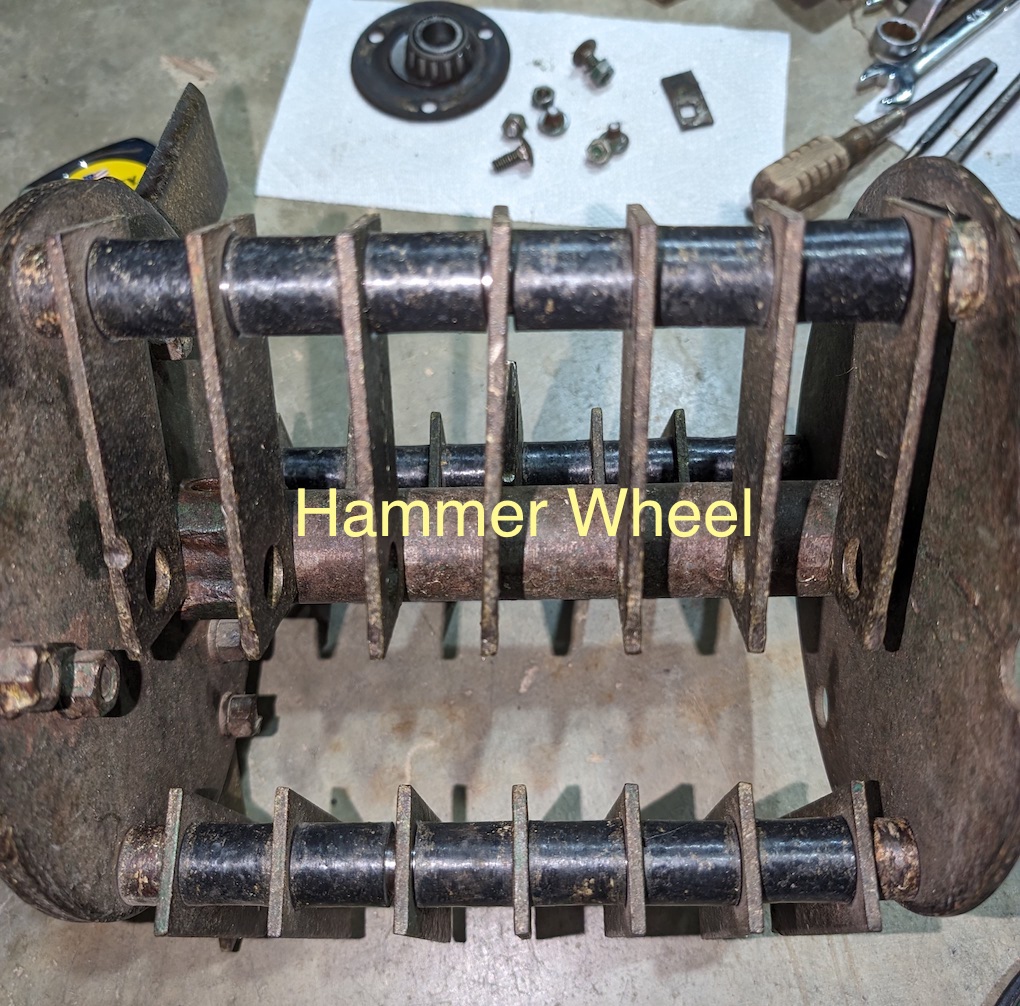
Figure 18: Hammer wheel removed. Hammers and side cutters in good shape.
The old bearings clean-up well enough, which reveals visible pitting on the rollers, a sign of wear.
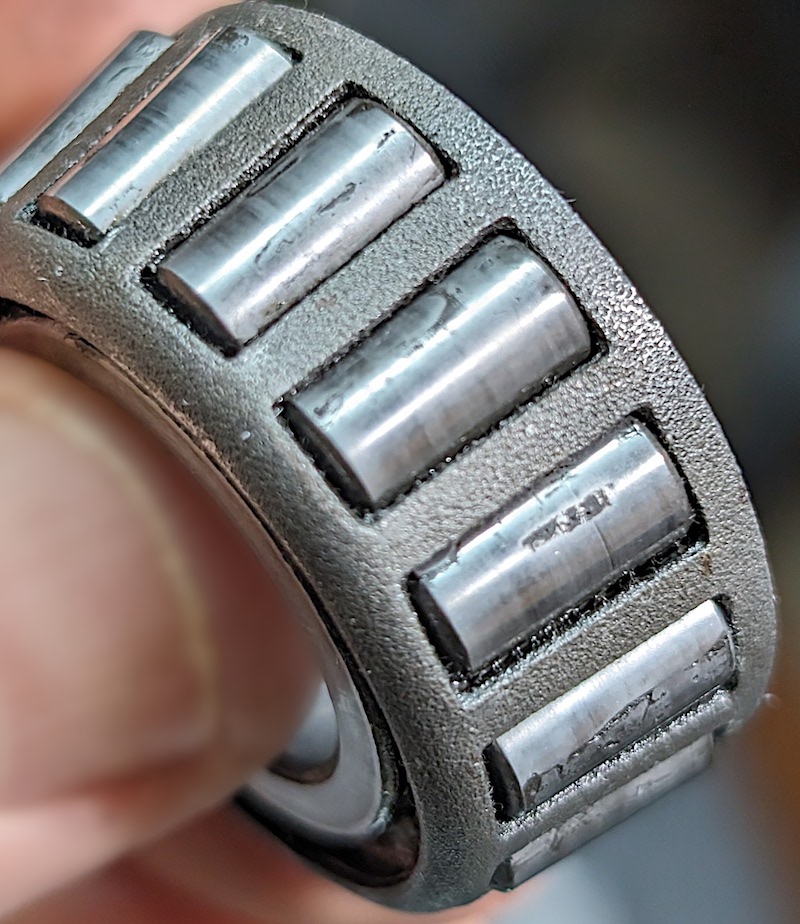
Figure 19: Visible pits in old roller bearings. Replace bearings.
The shaft is also in good shape, although the Woodruff keyway was slightly deformed from the forces applied by the drive pulley. We smoothed the shaft to allow the bearings to slide past the keyway.
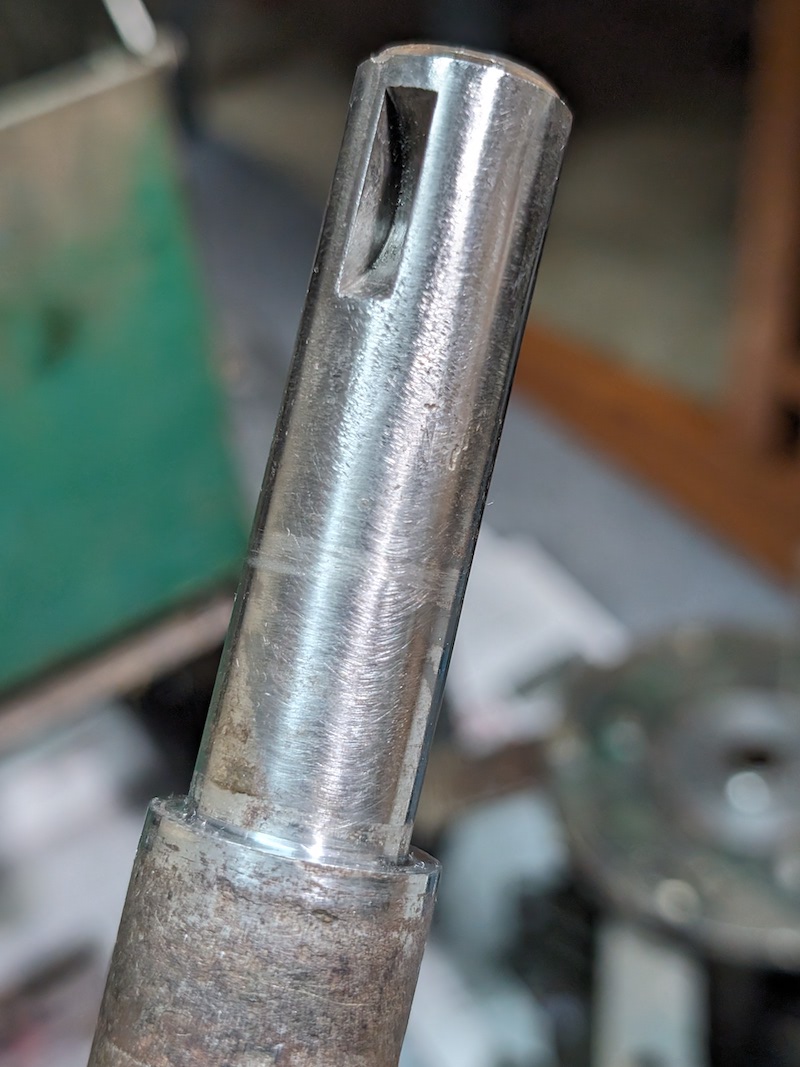
Figure 20: Main cutter shaft with Woodruff keyway for drive pulley.
These machines used standard parts, so it’s easy to find new roller bearings at a good price. It’s very cool to find new parts that were manufactured many years ago.
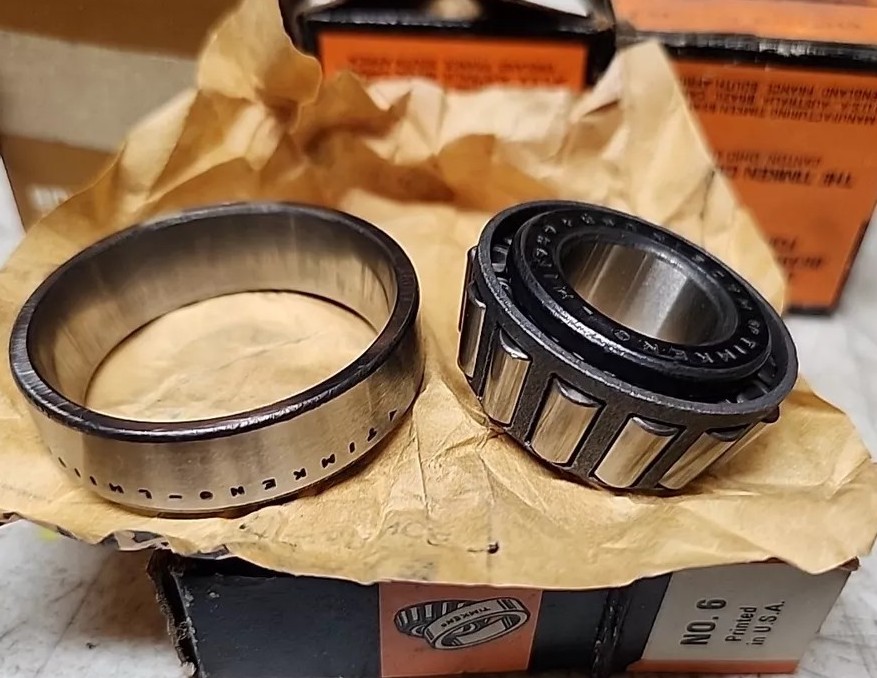
Figure 21: New old-stock Timken roller bearings. Readily available.
The bearing seals are a mystery. It’s not easy to identify the old material, and the seals provide a loose seal at best. The old seals are a crumbly fiber, maybe asbestos.
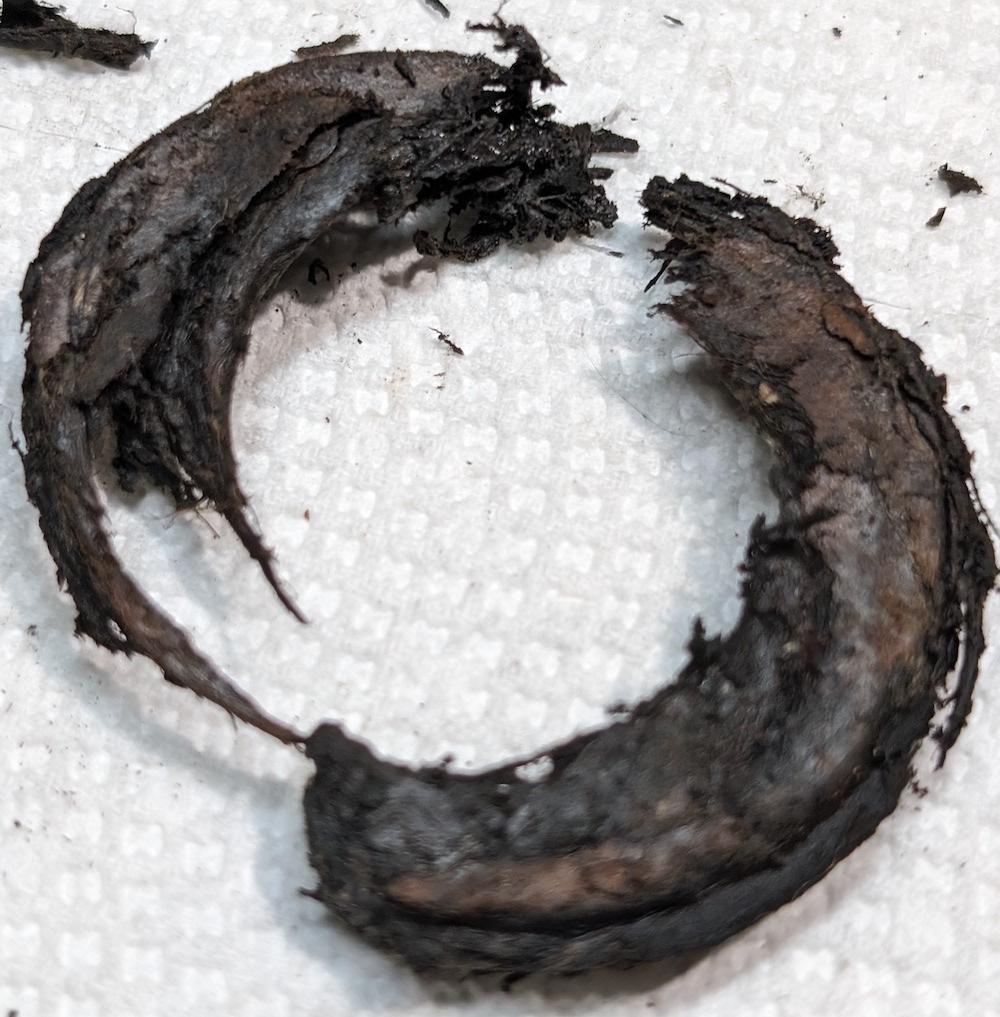
Figure 22: Disintegrating original bearing seal. Material unknown.
We made similar new seals from some very nice F1 wool felt. They fit well and seem durable.
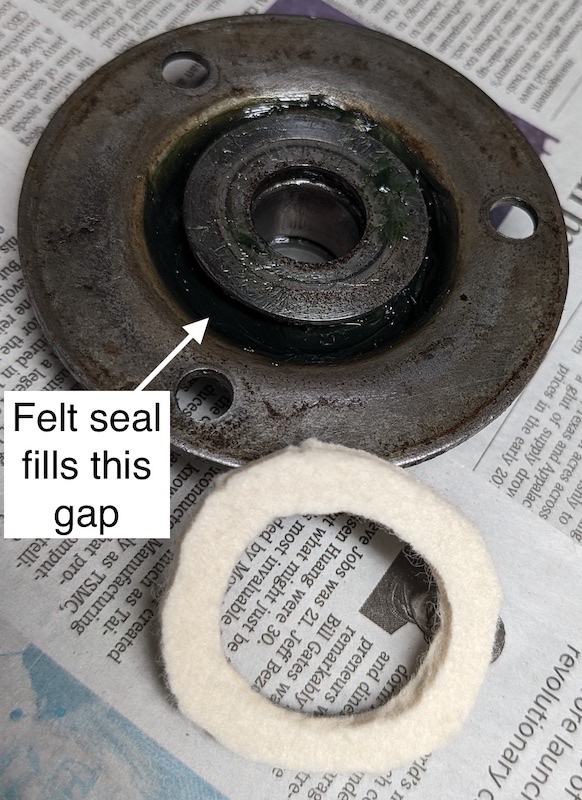
Figure 23: New F1 wool felt bearing seal (3/16", Grainger).
The bearing housings are in good shape. The new bearings press into the housings easily. The old Zerk fittings prevented adding grease without removing the drive pulley, so we instead used angled Zerk fittings that make adding grease much easier. Good lubrication is essential.
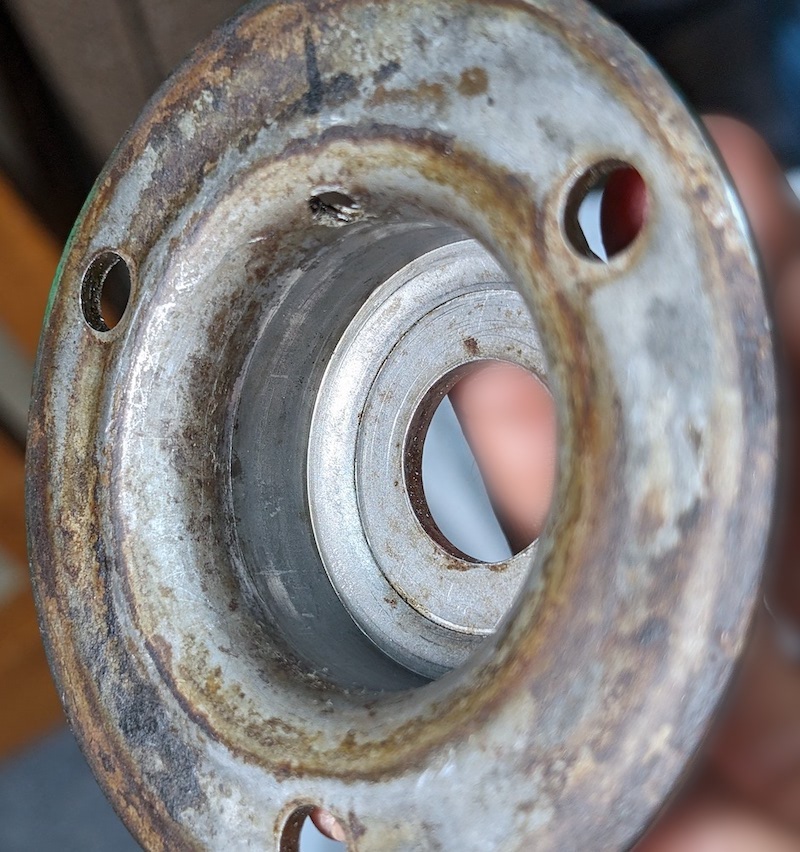
Figure 24: Bearing cup presses into bearing housing. Grease fitting hole visible.
Wrap up
This old Roto-Hoe machine is primitive and dangerous, but it can certainly reduce a large, messy pile of branches, sticks, and leaves into neat, mulchy, earthy stuff. We’ve probably run the machine for 30 hours over the past year, and we love the results.
If you’re going to buy an old machine, get one that’s popular enough to have lots of replacement parts. If parts are available, it’s rewarding and affordable to see an old machine do useful work. With sharp blades, solid bearings, and a smooth running engine, the machine will turn a large pile of debris into nice organic chips. This small chipper works so well, we’re considering a larger chipper that runs off of a tractor PTO.
In addition to this 40 year old chipper, we used a 40 year old Stihl 010 AV chainsaw to cut the larger branches and logs. You gotta love machines that do useful work for decades.